
Hello Everyone,
I have gotten a lot of great information from the Internet so I thought I would contribute. I will update this blog as my equipment and methods change.
I will go over everything from my brewing equipment and process, to growing yeast, fermentation, kegging and bottling and cleaning.
If anyone has any requests for other pictures, let me know and I will do my best to provide them. Also, I am very interested in peoples opinions, or ideas on how I may improve my setup/process. I can be contacted at rodonnel @ lakeheadu.ca
Warning Disclaimer!: I will be the first to admit my picture taking abilities are sub-par at best, so please excuse the reflection, feet and finger shots. I will update the pictures with better images as I take them. Also, the grammar will be a constant work in progress...
Also, if anyone is interested, here is my original post on brewing on a apartment stovetop before I built the electric kettle:
http://www.homebrewtalk.com/f170/5-gal-apartment-stovetop-biab-319562/
Brewing:
Here is a pic of my system, its a 15 gal EBIAB rig.
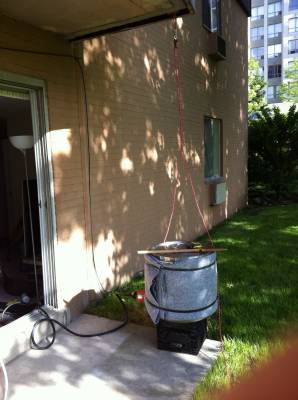
The kettle I chose was a 100 Liter Megapot.(20in inner diameter x 20 inner height) The pot started out bare bones without any holes. I had a family friend Joe, weld in a 3 Inch short Tri-clamp ferrule for the heating element, fabricate the heating element adapter for me, as well as weld on the 1/2 inch coupling for a ball valve and sealed all of the welds on the inside. The welding is virtually perfect and far outmatched my expectations.

The kettle insulation is comprised of two folded old U-Haul moving blankets and strapped with some black rubber Bungee cords. I chose the blankets due to them being free, easy to wash and/or replace. They also are quite dense and do a great job at insulating the kettle. The megapot has a very thick base, technically I could insulate it, but didn't think it was necessary.
I am planning on cutting a third blanket into circles to insulate the lid and a 4th to cover the kettle for the mashing stage, but those two upgrades are still on the "to do" list.
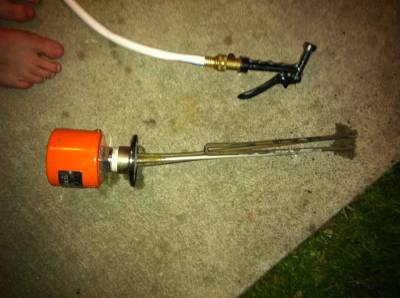
The element and orange housing is one unit and made by a company called Ogden. (from my understanding, a division of chromalox) The element is inlcoloy, 18 or so inches long with a SS shank. it is 5000w with an extremely low watt density of 30 watts per sq in. I found this element on ebay. Originally, the housing contained a thermostat and the element still has a built in thermowell, but the thermostat didn't work. Maybe in the future I put the thermowell to use, but only time will tell. The element was screwed into element adapter that Joe made using some good ole fashioned teflon tape.
Finally, after removing all of the old thermostat components, I installed 30 amp plug inlet into the front of the housing for easy cord management.
One other thing to note about these Ogden elements is that they have a standard NPT threading, unlike the Chromalox ones which use NPS(I think).
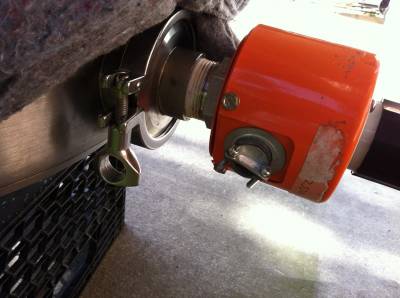
Here is another pic of the element/adapter after I disconnected it when I finished brewing. (ignore the ogre foot on the left)
Quick tip: I prefer to use only the cheapest garden sprayers, but then use a good brass shutoff to prevent the sprayer from leaking. This saves money in replacing leaky sprayers time after time.
The element got a bit bent this time while brewing but I can easily bend it back into shape. I will discuss avoiding this problem later in the article.
Here are some pics of the inside of the kettle, I will update these with better versions when I have some time.
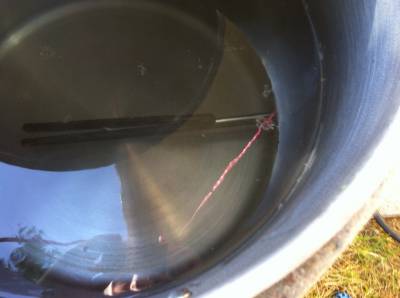
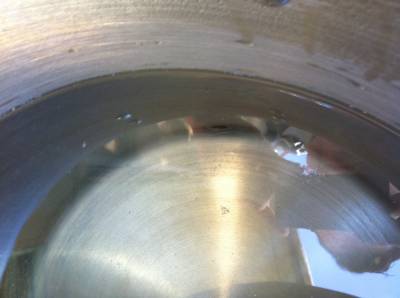
The red line is just a reflection of my rope. The right pic shows the drain hole, the pic on the left shows the element and currently unused thermowell(it is silver in color). The drain hole does have a threading in case I ever choose to install a pickup tube or internal filter, but since the hole is so low in the kettle, I haven't found that either of these two options are needed as of yet.
Below are some pics of my GFI box. (again, ignore ogre foot in pic 1)
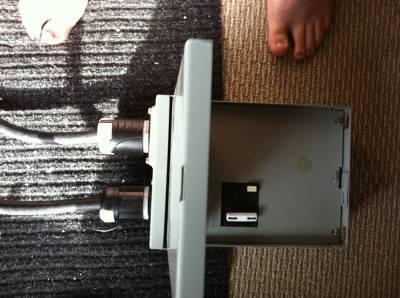
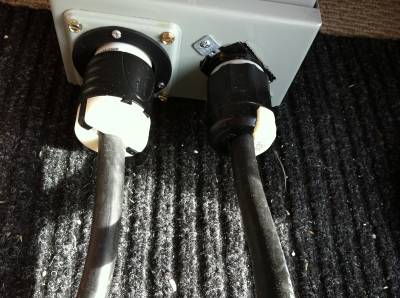
Both cords 4 wire 10 gauge 30 amp, but the kettle wire only actually uses 3 wires. The left plug is input, 30amp 4prong, right is 30amp 3prong output. My original idea was to install a GFCI 110v plugin into the sub panel as well, but I havent had a need for it as of yet. Currently, I am just turning the element off and on using the GFI button, but I plan to install a 30a switch in the near future.
Below is a pic of the element info.
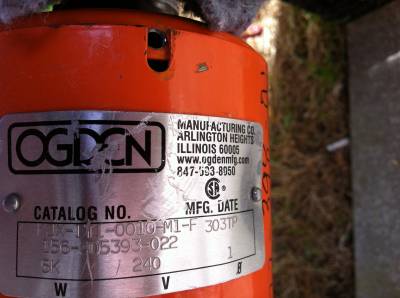
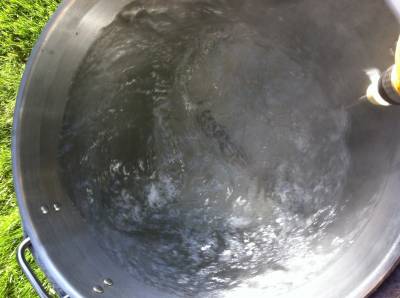
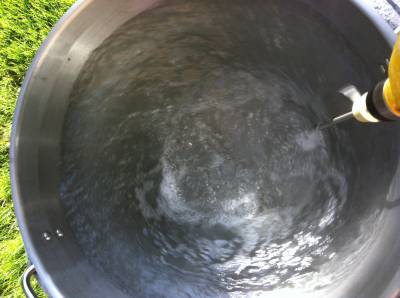
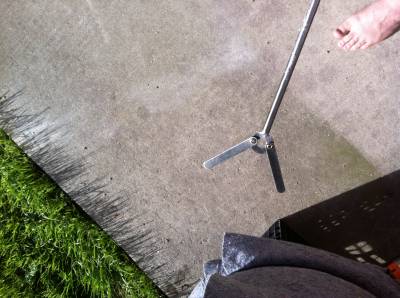
While these pics may look like I am just playing with my new whirlpool attachment, I was actually doing some precise whirlpool experiments. (Ok nevermind, maybe I was playing) The wine whip is useful for many things which include mixing in salts, cooling down the mash water (with whip on full, the kettle loses about 1 degree per min), stirring the mash.
Results of the whirlpool whip: this thing works much better whirlpooling from the side then in the middle of the pot, I can whirlpool it so fast that it spills out the side.(PS: bigfoot strikes again!)
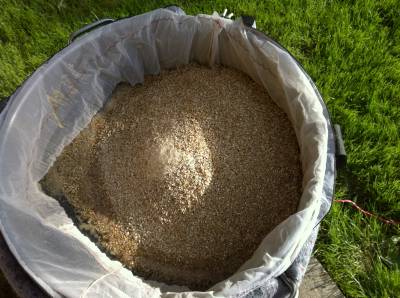
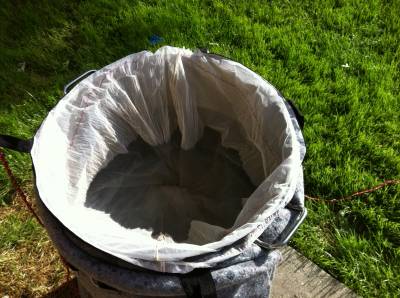
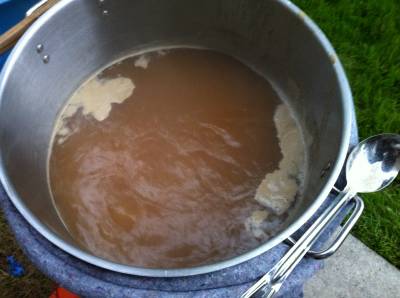
Here are some pics of the mash. With 14 or so gal of water for 18 lb of grain(this was a 10 gal batch), it is very easy to get rid of the chunks due to the high water to grain ratio. The BIAB bag I use is from CustomBIAB out of Ireland. The design of the bag is a cylinder, with pull cord that cinches the bag around the lip of the pot and lifting handles which are used for lifting. If the bag ever does rip or wear out, I will order another. The bag is top notch and I would highly recommend it! Originally, I used to I use a metal spoon to stir and mix, but now I prefer wood. The wood reduces the potential of chipping the element from striking it during stirring, and also the wood is a bit more nostaligaish. (is this a word?)
The straight flat paddle shape helps to scrape junk from the sidewalls and stirs easily, it is also easily scarred if you want marks for volume measurements.
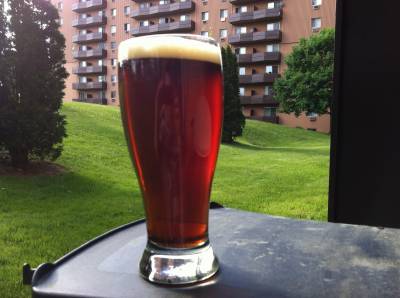
Mash time = Beer time. I think I am seeing double!
Many people use element shields to prevent the bag from scorching, pumps to recirculate, temp controllers with probes to better finetune the brewing process. I prefer the kiss approach. Just to turn the element off when the bag is in, and put the lid on. Generally, I give it a stir every 20-30 min or so and over an hour I lose about 1 degree F every 20 min (3 degrees F total). With another two blankets as i discussed above, I am sure I can reduce that amount even more. If I want to do a step mash, I will pull the bag up a bit off the element and turn on the kettle. For temp measurements, I stir pot and take a reading with a thermapen.
There are many fears on the internet about element scorching. But since there is no element shield and there is a high water to grain ratio, the energy from the element is almost instantly and constantly sucked from the element. This prevents bag melting. Also with no element shield, stirring is much easier and have I reduced temperature stratification problems, or risk of element charring.
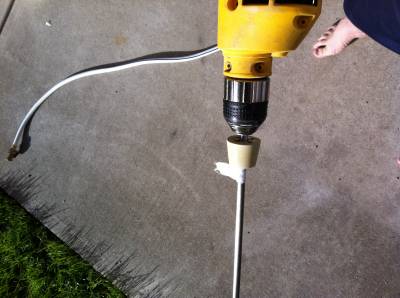
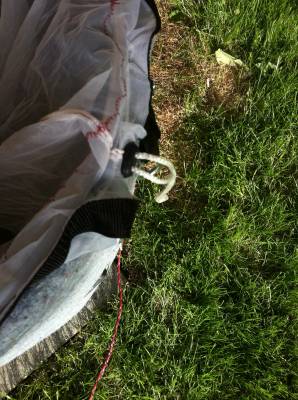
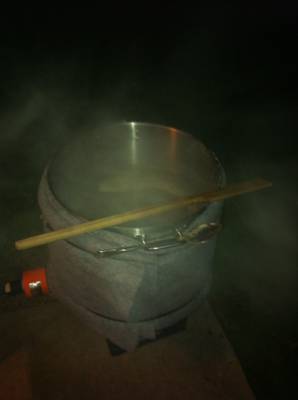
Time to raise the bag:
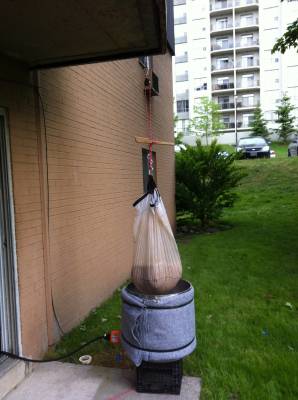
To pull the bag out, I just put a second loop on the other side of the cord and hook both loops to the bag. then I just spin my brew pattle in the cord to raise the bag out of the kettle. Next batch, i will try a 2x4 instead. If anyone has any alternative ideas on how to easily raise the bag in the kettle, let me know.
I recommend using a bow-line knot to hold the bag. (Who says Cub Scouts training isn't useful?!)
I haven't really got the liquid/volume ratio worked out as of yet. I have been too focused on developing my equipment. This time I added too much water. I generally just make sure I have enough grain to make 10+ gal of 1.050 wort, then just take gravity readings until i am at 1.050. I sporatically add hops when I feel like it, Overall, I prefer aroma and flavor characteristics of hops and don't have much interest in early addition bittering effects, so for me, its easy to gauge depending on the time left to boil. In the meantime I watch TV. This boil actually took much longer than usual.
In the future, I need to work on my water/boil time ratios. As you can see, more of a "Artistic brewer" rather than technical:)
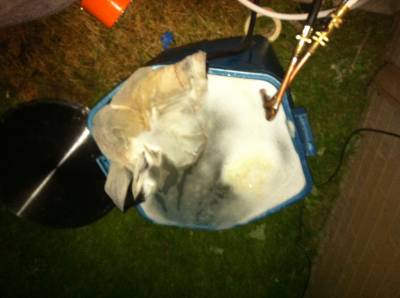
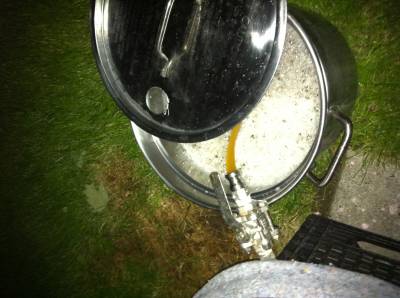
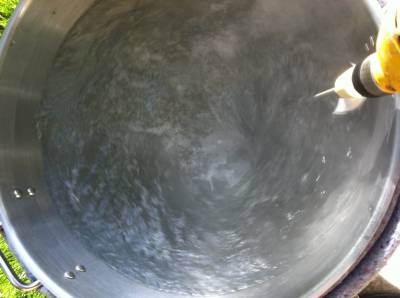
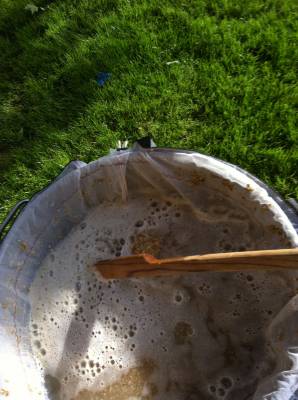
Here are some more pics of the cooling. I got a little overexcited using the whirlpool whip attachment for cooling. There was absolutely no foam until the beer got below 80F. Then it was foam city! The batch was simply 18lbs of maris otter and 4 oz of citra all added with 10 min remaining in boil.
As you can see, in pic 4, I use 6 gal pots to ferment in. They are easier to clean in the sink, have handles, are lighter and fit easily under the kettle for filling. I also can stack 2 in each fermentation fridge. The water jug is just extra wort left over that I will use for future starters.
The last image is of my element, installed in the kettle, I will take a better one next brew session.
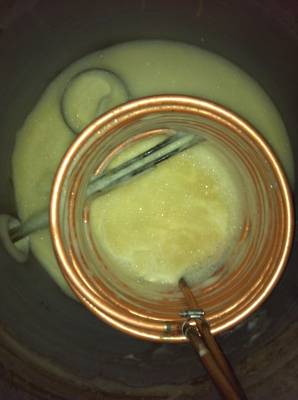
To cool, I prefer an 50ft 1/2 in Immersion chiller. my element sits 2 inches from the bottom. Since the kettle is so wide, if I put a 2 inch gap in coils 3 and 4 of my cooler, I am able to slide the element in between the coils of the cooler. To remove the element cooler afterwards, I find it easiest to remove the eleement triclamp and pull the element out the side.
The circle in pic 2 is a SS circlet. I was hoping the whirlpool would make the circlet collect the trub. but it didnt work as i had hoped. My next attempt will be using a diverter plate made from corrigated ss. The idea is to brew with the whole kettle on a 20-30 degree slant toward the spout, that way I should have no problem with liquid remaining in the kettle after draining.
The hole in the lid of the fermenters is so I can take direct temp and gravity readings while the pots are fermenting without having to take off the lids or using a hydrometer tube. I had to buy slightly shorter hydrometers so they would be able to take hydrometer readings without bumping the bottom of the pots.
A few interesting beneficial side effects of fermenting in SS pots:
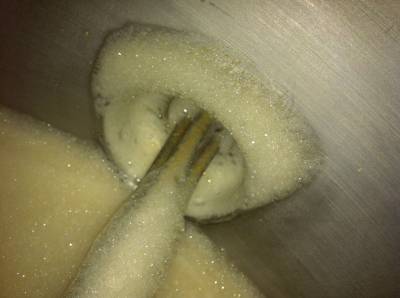
1) The weight of the lid acts as a airlock. if pressure builds, the lid allows gasses to vent. I have had some comments that the vessel is not completely sealed, but after reading about open fermentation and the idea of the krausen and co2 barriers. I feel that the weight of the lid is satisfactory.
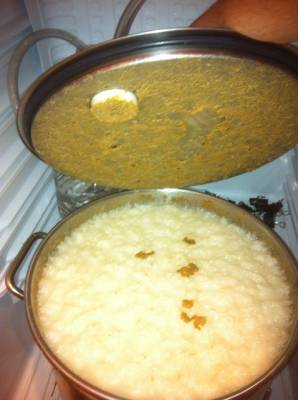
2) When the krausen grows and fills up the remaining 1 gallon void, the crust sticks to the lid. When I remove the lid, it is very easy to scoop out the light foamy yeast without getting any of the crust. Picture is displayed below: The kettle in the picture below has a rubber washer on it. I used to seal the kettle using the oring and desk clips, I dont bother anymore.
3) the ring around the top is the 5 gallon mark. It allows me to standardize the head-space and volume of beer. When I do have a blowover it is easy enough to clean out of my beer fermentation fridge. It seems to always keep a even amount of yeast ready for whenever I want to collect it.
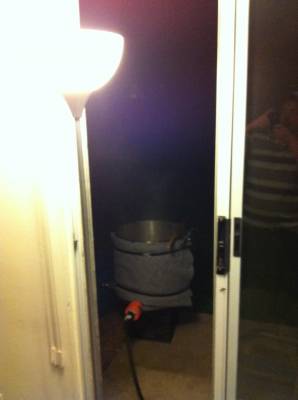
Fermentation chambers, kegerator, keg cleaning etc
The pic on the left is the inside of one of my fermentation Chambers.

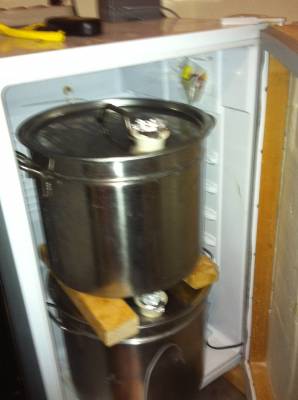
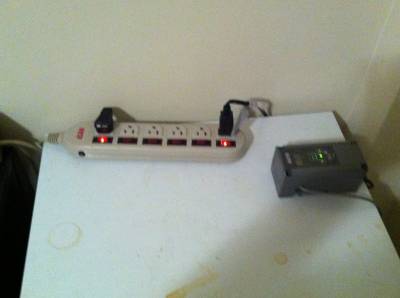
I had to install a 1x1 frame in the fermenter door to extend it slightly for the 6gal SS pots to fit. I also removed the thermostat and control the fridge via the temperature controller. Recently I installed a fan in each of my fridges to remove the ice on the cooling plate. The Ice acts as an insulator and severely reduces the cooling potential of the fridge. Prior to the fan, there was a 5 degree difference between the top and bottom fermenter, now the fridge stabilizes both pots to exactly the temp i choose within a few hours. The fan I chose is called vornado, its advantages are that its small, has a slow and fast speed setting, pivots and easily to direct, as well, the blades are shielded from accidentally being bumped and broken. The power strip allows me to turn either the fridge or fan off and on without messing with the johnson controller.
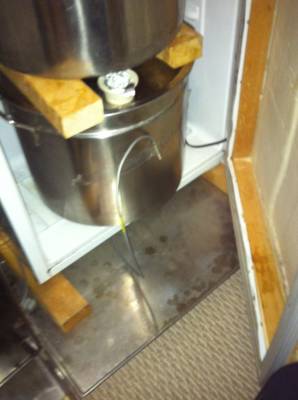
Since I live in an apartment, I have to be careful about wrecking the carpets. I found SS trays on kijiji that I have placed under each fermentation fridge just in case I get any fermentation overflow.
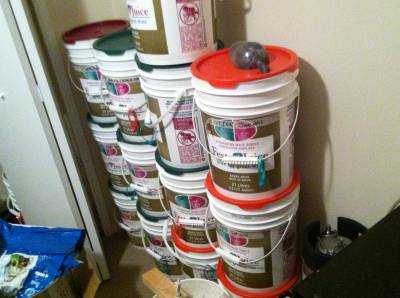
Grain Storage:
the best/cheapest option for grain storage are these 21 Litre old grape juice buckets. Each bucket holds EXACTLY 1/2 a bag of grain. They seal well, are stackable and cheap. $2 each from the local wine store.
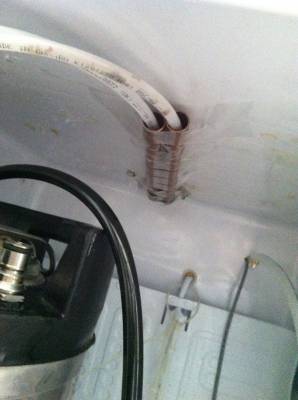
The next pic is of the inside of my kegorator. One of the main problems of homemade kegorators is chilling the tower. If the tower isnt chilled, your first glass will be foamy every time.
There are two main ways to cool the tower, either installing a fan/blower to blow air up into the tower, or install copper sleeves around the tubing and insulate the tower. Since copper is such a good conductor, the copper sleeves sleeves keep the beer lines nice and cool.
The line I chose is 3/16 bevflex ultra from Simgo in Mississagua it has a PET inner coating that prevents off flavors . If you have problems with taste in your lines, I recommend this stuff. The only problem is that it only offers 1/2 the restriction of regular beer line. So, to balance your system u need 2x as much of it. Alternatively, to using long beer lines, you can use a flow controller. I am waiting for the perlick 545SS to be relased to upgrade my beer taps.
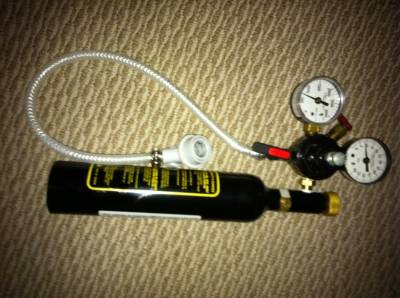
I have recently chosen to upgrade my co2 tank to 20lbs and plan on using portable paintball tanks if i want to travel with a 5 or 2.5 gal keg.
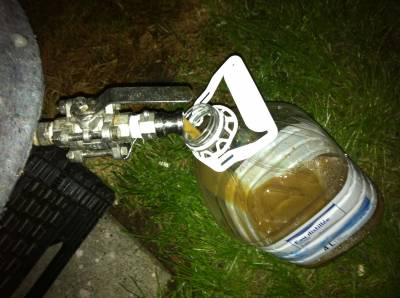
I have adapted my regulator and installed a co2 filler directly onto the regulator. Picture below:
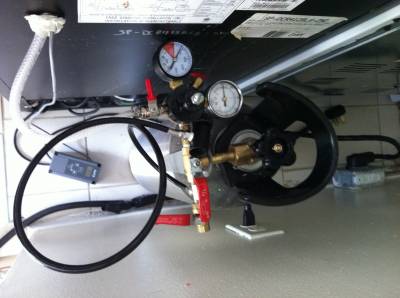
Edit: I have removed the 3 way valve and replaced it with two ball locks. To use the fill station, I turn off the tank, and swap out the regulator for the fill station.
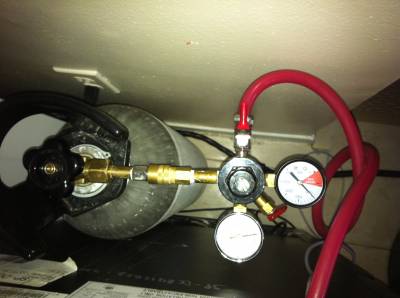
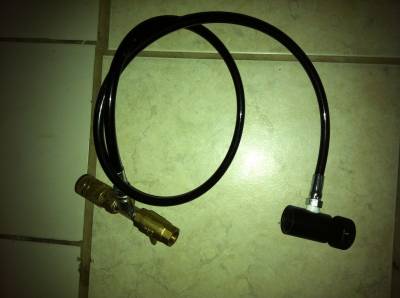
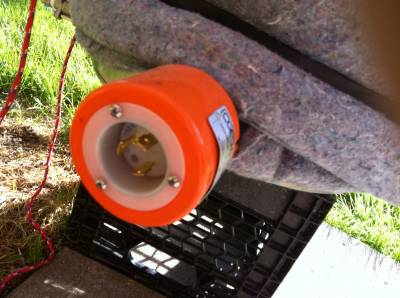
For those of you that are unfamiliar with co2 tanks there are 2 main kinds. The 5lb tank and 20 oz tank use shut off valves, while the tank on the right uses a pin lock valve (pics below). Any type of connector will work for the 5lb and the 20oz, but for the pin lock valve(right tank) the adapter needs a pin depressor.
So far, i have found 3 types of addapters: the main co2 one (left) it has a 1/4 inch nipple, and the two paintball adapters on the right with pin depressors use a 1/8 inch nipple.
My portable fill setup uses a co2 adapter(shown in right picture) then a 1/4 to 1/2 nipple. it is compatible with any of the tanks displayed.

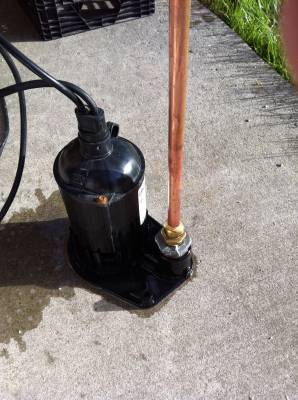
My next project is a keg cleaner. I bought this 1/3 hp sub pump and installed a coupler and a sharkbite fititng. to 1/2 in copper. The sharkbite is nice because I can change out the top pipe depending on what I want to clean. (keggle, carboy, erlen flask etc) I added a copper T and a liquid and air connectors but didnt feel it functioned very well. I have went back to just removing the posts and cleaning the liquid tube with a tube brush. In the future I would like to make a multi bottle washer attachment to clean beer and wine bottles similair to this one: http://www.homebrewtalk.com/f51/malfets-bottle-washer-lazy-homebrewers-381452/
SS Keg Resistor:
I am working on trying to make an inexpensive SS flow restrictor for kegging, much like the plastic swizzlestick idea.
Here is my current Prototype:

Basically, its a size 13 (I think) 4 inch machine screw with the head half cut off.
The idea is to insert it into the bottom of the dip tube when the keg is empty. Just flip the keg over, install the dip tube and put the screw into the tip tube before you push the tube up into the keg. (the half-head prevents it from sliding up the liquid tube but restricts the flow. The more of the head you cut off, the more flow you get. So far, it works great with water and beer with half of the head cut off. I have tried from 8 to 20 psi and the water always flows nice with same flow.
Thanks to Rob for helping me with the griding on this and earlier prototypes!
Stir plate:
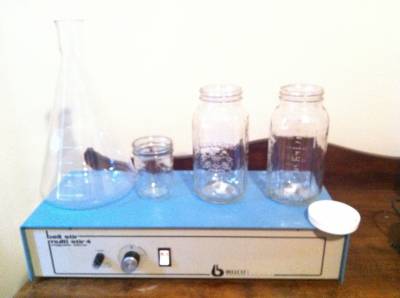
I originally created my own stirplate but I found it to be lackluster at best. It didnt work with beveled glassware, large stirbars, large glassware etc. Instead, I spend $93 and bought a used quad plate.
The main benefits is that it allows me to whip up multiple types of yeast at one time, use basically any container including mason jars with the beveled bottoms, and 4 and 6L Erlenmeyer flasks. I genuinely like the mason jars due to them being easily cleaned in dishwasher, hot liquid resistant, have volume gradients, have plastic lids and are cheap, unfortunately for a 1.5L starter i find the 2L mason jar a bit small.
I use 500ml Mason Jars for 350ml starters, and use the 4 Litre erlenmeyer flasks when I start adding 1.5L increments. I basically follow Bryan's step up guide (posted below on next blog post) 350ml, 1.5L 1.5L for 5 gal batches, then a 1.5L batch if I am brewing 10 gal, or a 3L if I am brewing 15 gal 5% ale.
I have chosen to standardize the 1.5L step-ups so I can pre-freeze them in 2L mason jars and just thaw an boil as needed. I either store 1.5L of 1.040 wort or 1.2L of 1.050 wort and just dilute with water. (depending on if i mashed grain on stove or if the wort was leftover from a brew session)
I try to run my stirplate on maximum speed and cover the 4L Erlenmeyer flask with a piece of swiss voile affixed with a rubber band, and then a tinfoil cover. The swiss voile is to prevent fruit flies from getting in. After reading the following article: (http://braukaiser.com/blog/blog/2013/03/25/stir-speed-and-yeast-growth/)I try to run the stirplate on as high of a setting as possible without tossing the stirbar.
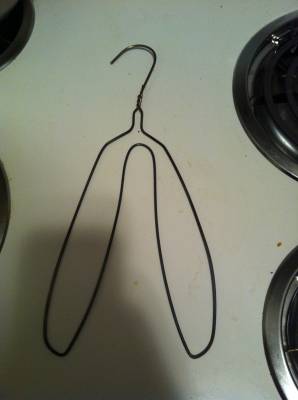
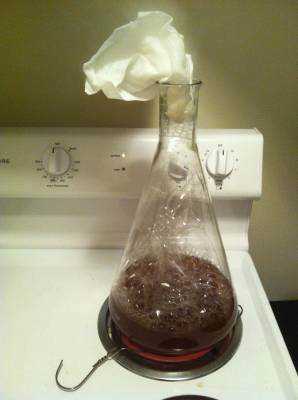
My first 1.5L wort jump, I boil on the stove using the 4L flask, this sterilizes the flask as well. the next wort additions I use a pot. I find level 7 seems to be a reasonable heat level (level 6 if you have an upgraded Canning element) I put piece of paper towel loosely in the top just to break the bubbles that the flow up the flask, otherwise they tend to spill over onto the element. I also use a homemade trivet made from a metal coat hanger. The trivet evens out the heat on the flask which prevents the wort from burning and flask from breaking.
Projects and pics still needed:
Bottling from keg:
Storage of bottles:
portable mini keg

Wow, fantastic setup!
Thanks Colin!
I JUST got through this whole thing. Nicely done Ryan 😉
Ryan, I chatted with you a bit about BIAB at the end of the last meeting (my first time there).
If you want to know your boil rate, it “should” be as simple as your heater wattage divided by the specific heat of conversion of water… minus losses around your kettle, which you can figure approximately by your statement of 1*F/20min times the mass of water you’ve got to figure the total heat loss in watts.
I’d love to try a beer or two of yours with the 4oz at the end of boil and none at the beginning. I’m curious what effect this has on malt/hop balance.
You mentioned at the meeting that your trub gets caught up in the foam from the wine whip – can you show us a pic of a settled carboy… or do you ever use a carboy?